Creating an Azure Virtual Machine with SQL
Creating an Azure Virtual Machine with SQL is necessary to fully leverage the benefits of both Azure VMs and SQL Server. Azure VMs offer unparalleled flexibility and scalability that can be finely tuned to meet your computing needs. On the other hand, SQL Server delivers an extremely resilient and reliable database management system that empowers you to store, manage, and analyze data effectively.
To create an Azure virtual machine with SQL in the Azure portal
- Sign in to the Azure Portal account where VM needs to be created.
The Azure Portal Home pane appears.
- In the Search box, search for SQL virtual machine.
- Under SQL virtual machines, in the Image list box, choose the required image for the virtual machine and click Create. The Create virtual machine pane appears.

Basics
You can use Basics pane to add project details, instance details, create administrator account, and Inbound port rules.
- Under Project details, do the following:
- In the Subscription list, choose the required subscription.
- In the Resource group list, choose the required resource group.
If you do not have one, click Create new, enter the name, and click OK.
- Under Instance details, do the following:
- In the Virtual machine name box, type virtual machine name.
- In the Region list, choose the required region.
- In the Availability options list, choose the required option.
- In the Security type list, choose the required security. The default security type is Standard.
- In the Image list, choose the required Windows image.
- For the VM architecture, click the required option.
- For Run with Azure Spot discount, select the checkbox if you need a spot discount. Click the information icon for more details on the spot discount.
- In the Size list, choose the required VM size. If you want to see all sizes, click See all sizes to compare the sizes and prices.
- Under the Administrator account, do the following:
- In the Username box, type username.
- In the Password box, type a strong password.
- In the Confirm password box, retype the password to confirm.
- Under Inbound port rules, do the following:
- For Public inbound ports, click Allow selected ports.
- In the Select inbound ports list, choose RDP (3389) port.
- Under Licensing, leave the checkbox unselected.
- Click Next: Disks. The Disks pane appears.
Disks
You can use Disks pane to select the disk type, size and other details.
To configure disks
- Under VM disk encryption, leave the VM disk encryption checkbox unselected.
- Under the OS disk, do the following:
- In the OS Disk type list, choose Premium SSD (locally-redundant-storage).
- Select the Delete with VM checkbox.
- In the Key management list, choose Platform-managed key.
- Leave the Enable Ultra Disk compatibility checkbox unselected.
- Click Next : Networking >. The Networking pane appears.
Networking
You can use networking pane to add virtual network, subnet, public IP, network security group and other details. Azure automatically creates a network interface when creating a VM.
To add details in the networking pane
- Under Network interface, do the following:
- In the Virtual network list, choose a virtual network.
- In the Subnet list, choose the default subnet.
- In the Public IP list, choose the public IP.
- For NIC network security group option, click Basic.
- For Public inbound ports option, click Allow selected ports.
- In the Select inbound ports list, choose RDP (3389).
- Select the Delete public IP and NIC when VM is deleted checkbox.
- Leave the Load Balancing section to its default value.
- Click Next : Management >.
The Management pane appears.
Management
You can use Management pane to enable auto-shutdown and select OS updates option.
To set up management
- Under Auto-shutdown, do the following:
- Select Enable auto-shutdown checkbox.
- In the Shutdown time box, enter the timings.
- In the Time zone list, choose the required time zone.
- Under Guest OS updates, in the Patch orchestration options list, choose Automatic by OS (Windows Automatic Updates).
- Click Next : Monitoring >.
The Monitoring pane appears.
Monitoring
You can use the Monitoring pane to set up alert rules and diagnostic settings. By default, boot diagnostic is enabled with a managed storage account.
To configure alerts and diagnostics
- Under Alerts, select Enable recommended alert rules
- Under Diagnostics, click the required option.
- Click Next : Advanced >. The Advanced pane appears.
Advanced
You can use the Advanced pane to install VM applications, add custom data, user data and other advanced settings.
- In the Advanced pane, choose the required options and click Next : Tags >. The Tags pane appears.
SQL Server settings
You can use the SQL Server settings to set up SQL authentication, Security and networking, SQL instance settings, and others.
- In the SQL Server settings pane, either go with the default values or choose the required settings for the following:
-
- Security and Networking: Choose the SQL connectivity and port.
- SQL Authentication: Enable or disable SQL authentication and Azure key vault integration.
- Storage Configuration: Go with the default configuration.
- SQL instance settings: Go with the default configuration.
- SQL Server license: Choose either default option No or Yes, if you have a SQL server license.
- Automated patching: Change configuration for patching if required.
- Automated backup and R Services: Default values
- Click Next : Tags >.
The Tags pane appears.
Tags
- Enter a name for the tag in the Name box.
- In the Value box, enter a value.
- Choose the number of resources from the Resource list box.
- Click Next : Review + create >. The Review + create pane appears.
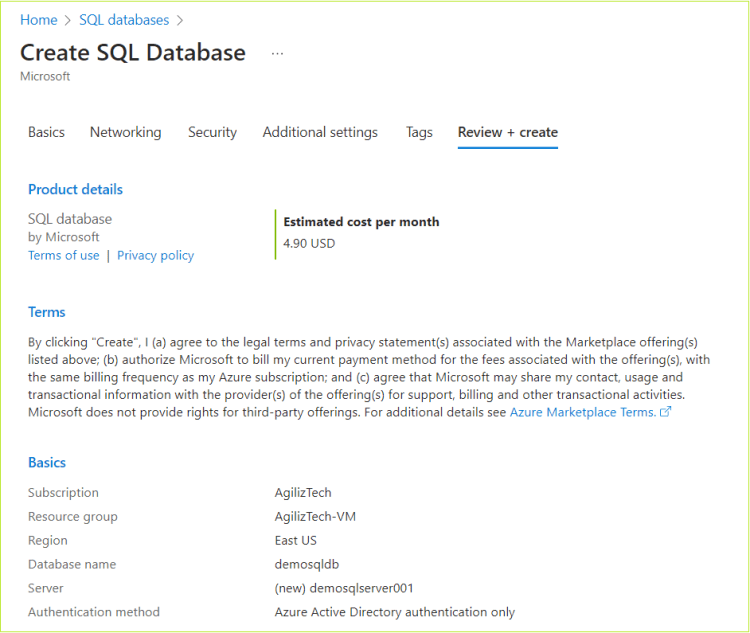
Review + create
- Once the validation is passed, review the VM details and click Create.